


Table of Contents
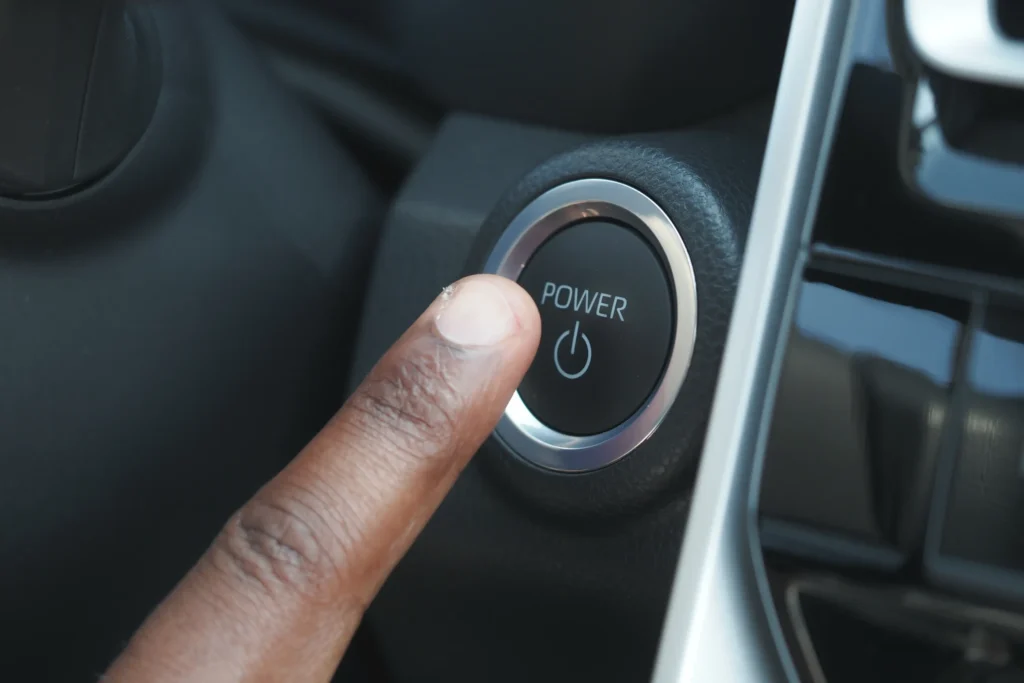
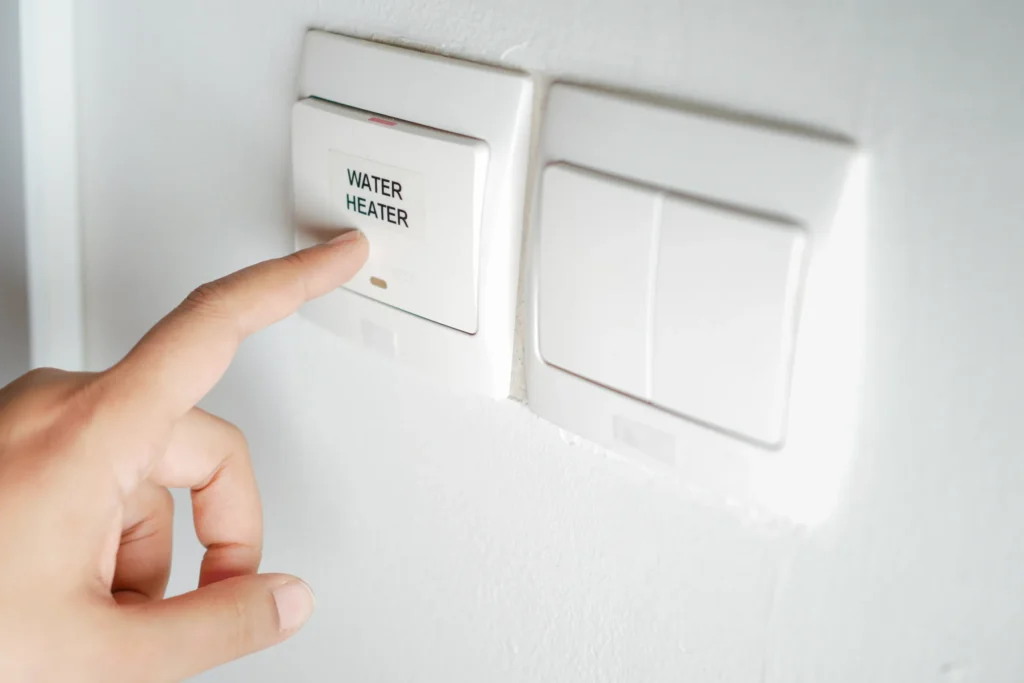
Push button switches are the simple buttons we see every day on devices like doorbells and coffee makers. With just one press, they control electrical circuits. Yet, despite their plain appearance, these switches come in many forms and functions that can confuse even experienced DIYers.
This guide explores the world of push button switches in detail. It offers a clear understanding for everyone—from beginners to experts. Get ready to discover how these useful components work and learn to wire them confidently.
What is a Push Button Switch?
Think of a push button switches as a gatekeeper controlling the flow of electricity. When you press the button, it opens the gate, letting electricity pass through and turn on a device. When you release the button, the gate closes, stopping the electricity and turning the device off. It’s a simple yet effective mechanism.
Exploring Different Types of Push Button Switches
Although they all work on the same basic idea, push-button switches come in various types, each suited to different uses:
1. Momentary Push Button Switches:
This is the most common type. It works only while being pressed, closing the circuit to allow electricity through. When you let go, the circuit opens again, stopping the flow. A good example is a doorbell, which rings only when you hold down the button.

2. Latching Push Button Switches:
These switches keep their state after being pressed. One push turns the circuit on and it stays on until you press it again to turn it off. They toggle between on and off with each press.
3. Illuminated Push Button Switches:
These switches have built-in LED lights. The light can show whether the switch or the connected device is on. They also help locate the switch in the dark.

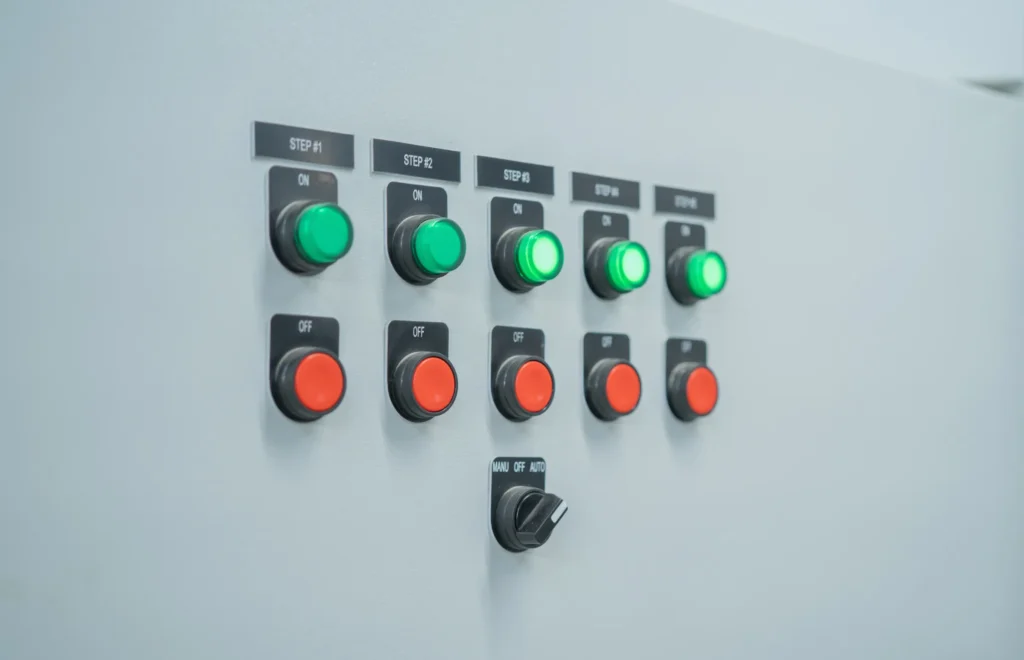
4. Safety Push Button Switches:
Designed for emergencies, these usually have a bright red button that’s easy to find. Pressing it quickly cuts power to machinery or processes to prevent accidents or damage.
Decoding the Language of Your Switch: Understanding the Terminals
Before diving into wiring, it’s important to get familiar with the terminals on a push-button switch. These terminals are the points where you connect wires to include the switch in your circuit. Each terminal has a specific purpose, so knowing their roles helps you wire your switch properly.
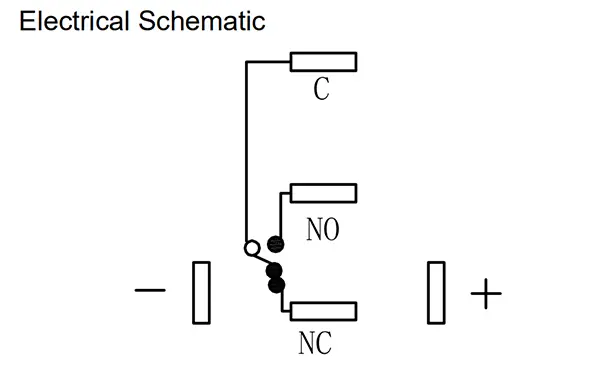
The Main Terminals Explained:
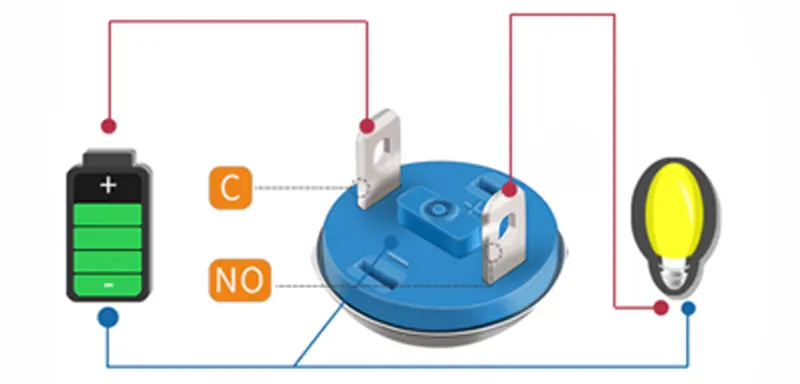
1. C (Common):
This is like the main power line in your circuit. It usually connects to the positive (+) side of your power source, sending electricity to the switch.
2. NO (Normally Open):
Think of a doorbell button. When it’s not pressed, the circuit is open, and no electricity flows—just like the doorbell is silent. The NO terminal works the same way. It stays open until you press the button, which closes the circuit and allows electricity to flow.
3. NC (Normally Closed):
Imagine a light switch that is on, letting electricity pass and the light glow. The NC terminal operates like this—it’s closed by default, so electricity flows through it. Pressing the button breaks the circuit and stops the current, similar to turning the light switch off.

4. + (LED Positive) & – (LED Negative):
Some switches have built-in LEDs for visual signals. These two terminals connect to the LED, with + linking to the positive side and – to the negative side. This setup lets you control when the LED lights up.
Wiring Your Push Button Switches: A Beginner’s Guide
Ready to add “push-to-activate” control to your projects? This simple guide will walk you through wiring different types of push-button switches.
Now that you know the key terminals—C (Common), NO (Normally Open), NC (Normally Closed), and the LED terminals—let’s see how to connect them in real circuits!
Safety First!
Whenever you handle electricity, be careful:
- Disconnect Power: Always turn off and unplug your power source before working on wiring.
- Double-Check Connections: Review everything against your wiring diagram to avoid mistakes.
- Ask for Help: If unsure, especially with higher voltages, consult a professional electrician.
Wiring a 2-Pin Push Button Switch
A 2-pin switch is the simplest and acts like a basic on/off switch.
How to wire it:
- One pin is for power input (IN), the other is for output (OUT) to your device.
- Connect the IN pin to the positive (+) terminal of your power source.
- Connect the OUT pin to the positive (+) side of your device (like an LED or motor).
- Connect the negative (-) side of your device back to the negative (-) side of the power source to complete the circuit.
- Make sure power is OFF while wiring!
When you press the button, the IN and OUT pins connect, turning your device on.
Wiring a 4-Pin Push Button Switch
This switch has a built-in LED for visual feedback. There are two popular wiring methods:
Setup 1: Device and LED Turn On Together
- The LED lights up only when the button is pressed and the device is on.
- Connect NO to the power source (+) and to the device’s positive (+) terminal.
- Connect the LED’s positive (+) terminal to the same line as the device (+).
- Connect the LED’s negative (-) terminal to the power source negative (-).
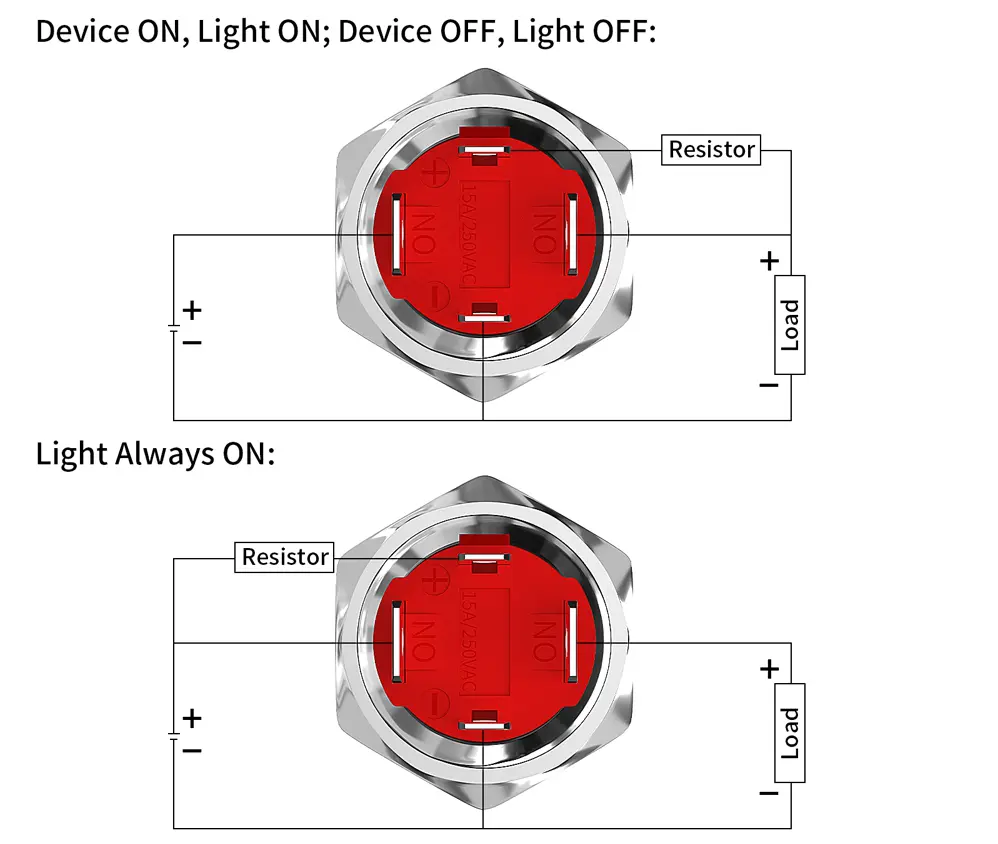
Setup 2: LED Always On
- The LED stays lit to show the circuit has power, regardless of the device state.
- Connect NO to the power source (+) and the device (+) as before.
- Connect the LED’s positive (+) terminal to the Common (C) terminal.
- Connect the LED’s negative (-) terminal to the power source negative (-).
Wiring a 5-Pin Push Button Switch
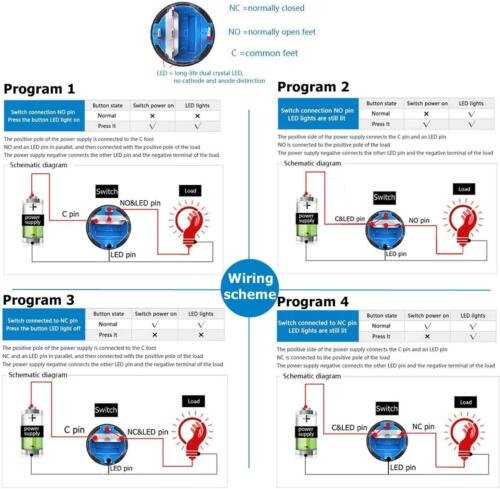
The 5-pin switch offers the most flexibility. It includes NO and NC terminals alongside C, plus LED terminals.
Understanding the pins:
- C (Common): Power input, connect to the positive (+) side of your power source.
- NO (Normally Open): Allows current only when the button is pressed.
- NC (Normally Closed): Allows current until you press the button, which then breaks the circuit.
- + and – for LED: Connect to the LED’s positive and negative sides.
What you can do:
- Use NO to turn a device on only when pressing the button.
- Use NC to turn a device off when pressing the button.
- Connect the LED to C for a power indicator (always on).
- Connect the LED to match your device’s circuit (NO or NC) to light it only when the device is active.
Because the 5-pin switch is versatile, it’s best to follow specific wiring diagrams for your desired function.
Conclusion
Congratulations! You now know how to wire different push button switches. Keep practicing and experimenting to build your skills.
Always prioritize safety, and have fun bringing your electronic projects to life!